How To Build A Shopify Landing Page That Converts in 2026
Driving traffic to your site is tough. Once you’ve got those hard-won clicks, you don’t want to waste them on the wrong page. This article shows you exactly how to build a Shopify landing page that customers will stick to.
How To Build A Shopify Landing Page That Converts
The 4 Types Of Shopify Landing Page
- Turn Your Product Collections Into Landing Pages
- Create A New Landing Page Template
- Use A Shopify Landing Page App
- Use a Bolt-On Builder
- Use s Shopify Social Proof & FOMO App
DON’T LAUNCH Before Checking This Landing Page List
In order to make the most of your traffic, it’s important that your landing pages are tailored to the people who see them. They should outline a clear offer and tell your customers exactly what they need to do to get it. There are three key things to consider when building your Shopify landing page:
- Consistency: Make sure your page matches the ad or the link that sends people to it. You want to make things as easy as possible for your customers
- Simplicity: Don’t make your customers think too hard – save brand-building for another time
- Trust: People avoid situations with uncertain outcomes. You need to reassure them and anticipate their doubts
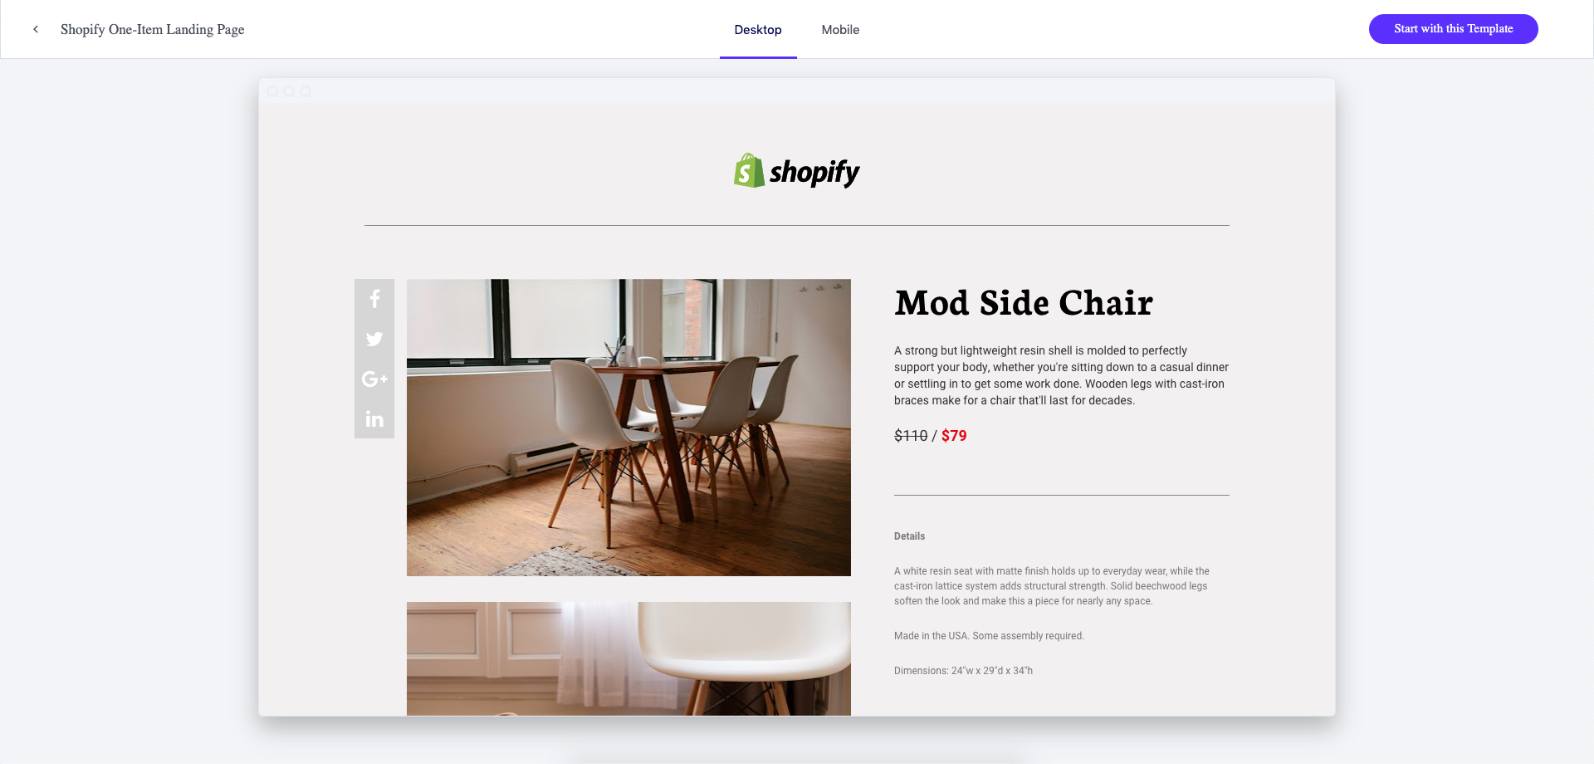
Here are some examples of Shopify landing pages that apply these rules perfectly…
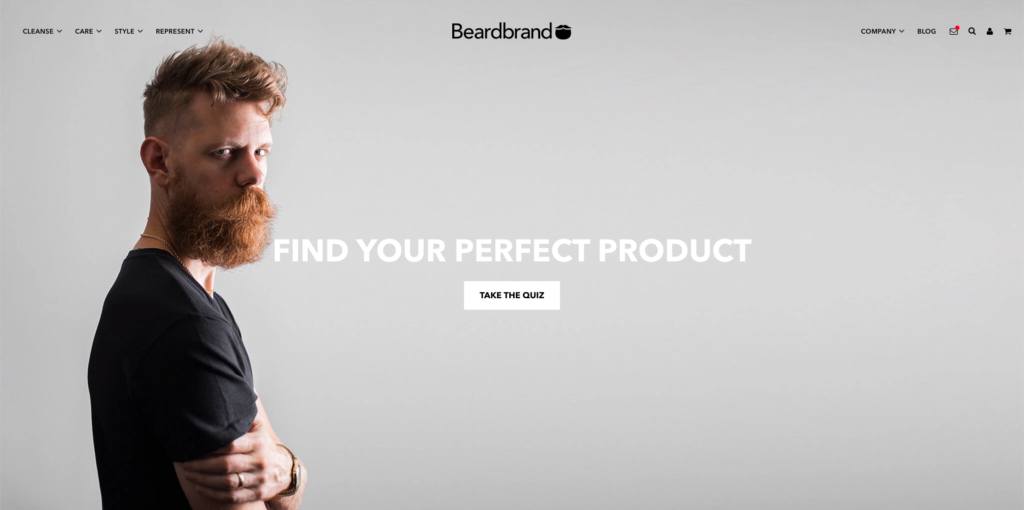
This page uses a very simple design, with a single CTA and button.

This page uses the same headline as the Google ad that drives traffic to it – giving it consistency.
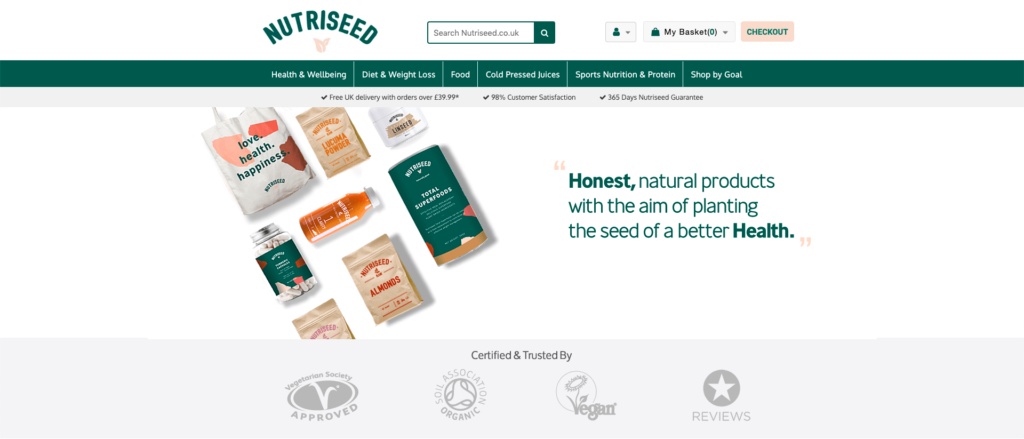
This page uses client logos to build trust instantly.
The 4 Types of Shopify Landing Page
To increase your landing page conversion rate, make sure your visitors know where they are and why they are there.
Although every store is different, most Shopify landing pages are built in one of four ways…
- Using product collections (such as seasonal promotions)
- Making a custom template
- Using a Shopify Landing Page Builder (Shogun, PageFly, etc…)
- Creating a landing page with a third party (Unbounce, LeadPages, etc…)
Each of these four methods will allow you to create a great landing page. The one you choose will depend on your budget, the skills you already have and the traffic you expect to get.
1. Turn Your Product Collections Into Landing Pages
All Shopify themes support product collections. Shopify even provides its own instructions for creating collections pages. If you know who will be directed to these pages, you can customise them to suit that traffic. So, if your PPC campaign is based around a seasonal promotion, you can build a collection with this in mind.
Using a product collection as your Shopify landing page has some big advantages.
- It shortens the distance to your “add to cart” button
- Designing and writing the page is simpler
- Customers already know how collections pages work, so there is very little “friction“
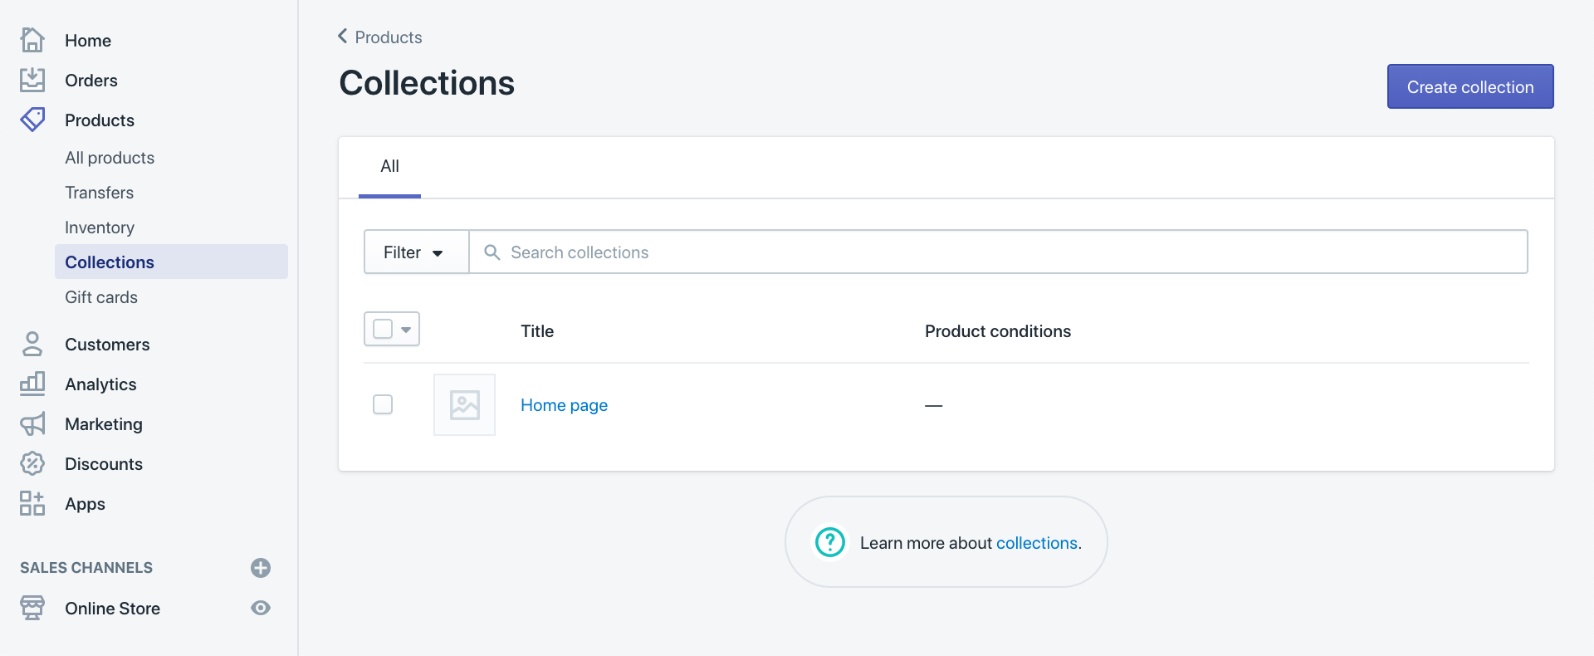
How To Set Up Product Collections Pages In Shopify
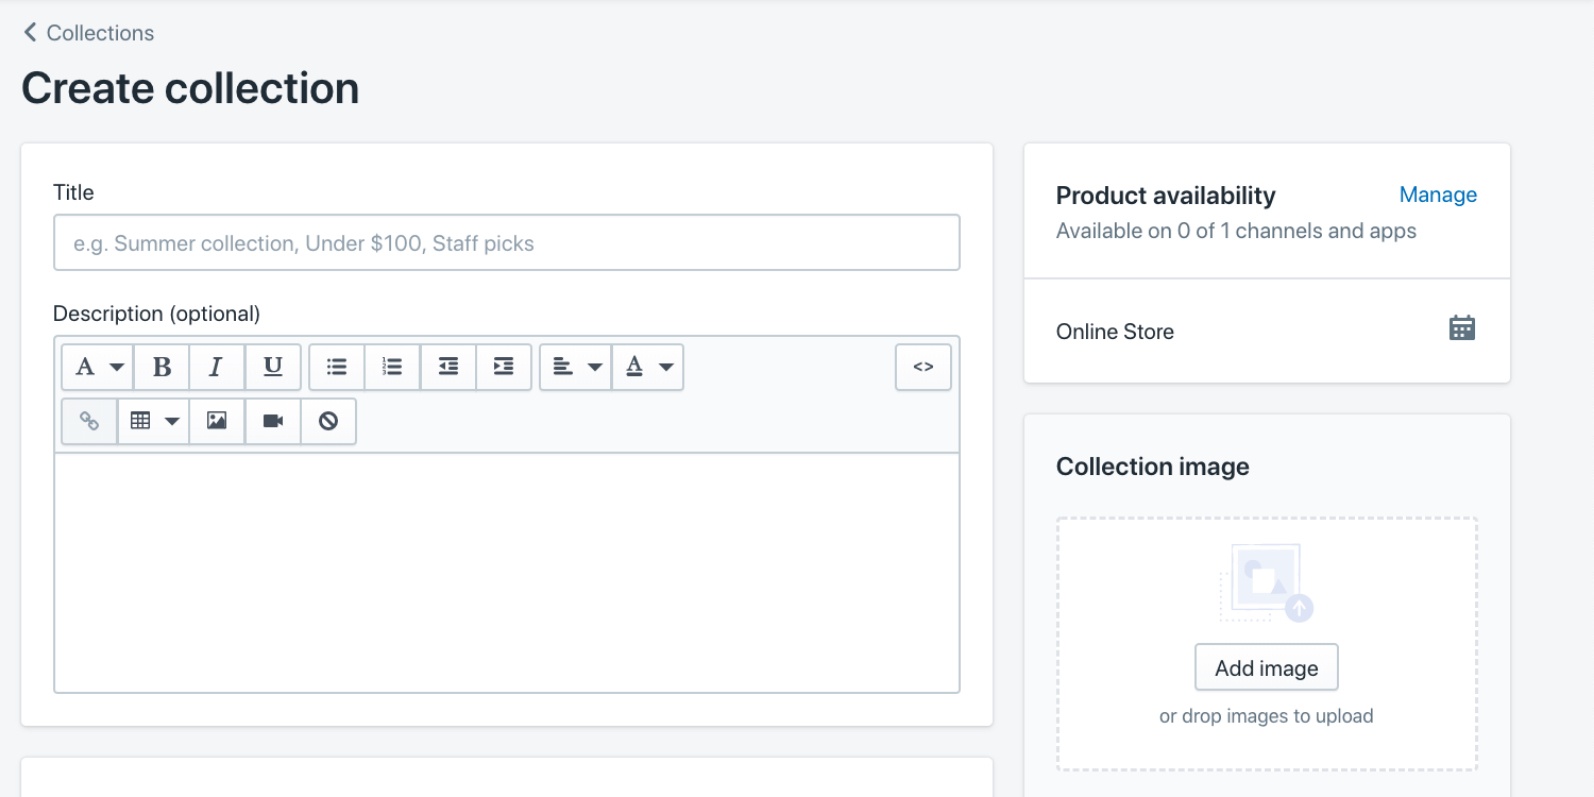
Step 1: Go to “Products” in your menu and select “Collections”. You can choose to add products manually or set up an automatic category.
Step 2: Choose a Title and URL for your page. The address you pick should be SEO friendly (so that people using the right search terms can find your page). It should match the words you use in your adverts.
Step 3: Make a note of any tracking parameters you use for paid ads. That way, you can target web notifications, widgets, pop-ups and dynamic text to specific campaigns.
2. Make A Shopify Landing Page Template
By creating a new template within your Shopify theme, you can tailor any page to the traffic it receives. This is a slightly more complicated technique, but it allows you to do much more with your theme.
- What is a Shopify theme? Every Shopify store uses a theme. This changes how your store looks and what features it has.
- What are Shopify templates? To turn your theme into a page, you need a template. Every page in your store follows the rules of a particular template, which says where each feature goes. For example, your product pages follow a template that includes a “buy” button.
By creating a new template, you can build custom landing pages within your Shopify store. This is quite simple to organise, but it will require some HTML editing.
First, you need to know if your Theme is “sectioned” or “non-sectioned”.
- What is a “sectioned” theme? Themes created more recently are usually “sectioned”. Certain elements of the template are contained in separate blocks called “sections”. This allows a drag-and-drop editor to move elements around easily.
To find out if your theme is “sectioned” or not, go to your “Online Store Section” and Click on “Themes”.
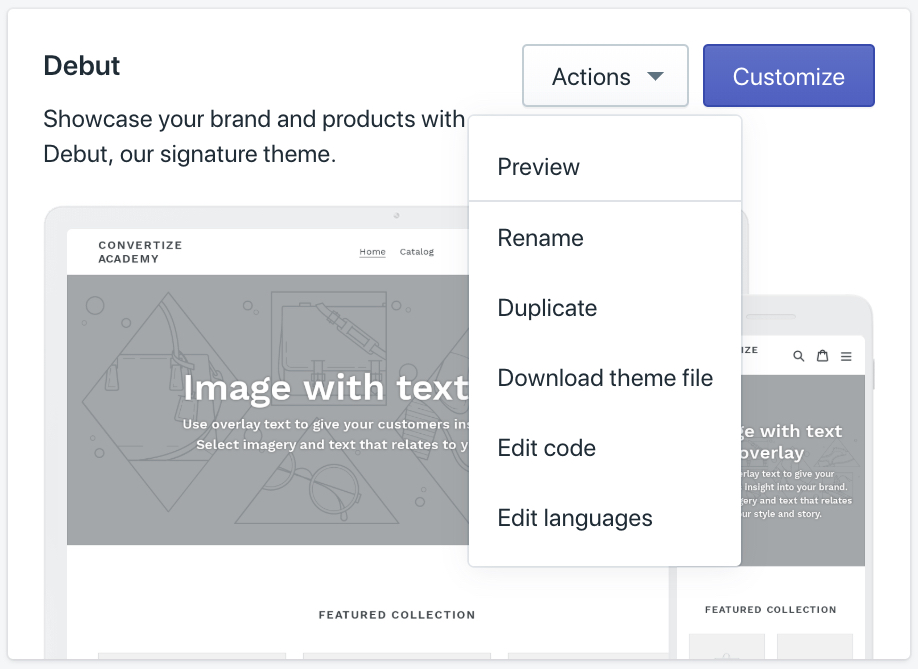
Once the Themes page is open, click on the drop-down “Actions” menu and choose “Edit Code”.
Within the theme editor is a list of directories containing “Liquid” files.
- What is a Liquid file? Liquid is the language Shopify uses to build themes and templates. Liquid tags describe how elements are ordered and what they look like. They are always bookended with {% and %} and can also be used to load dynamic content.
You may see directories for:
- Layout
- Template
- Sections
- Snippets
- Assets
- Config
- Locales
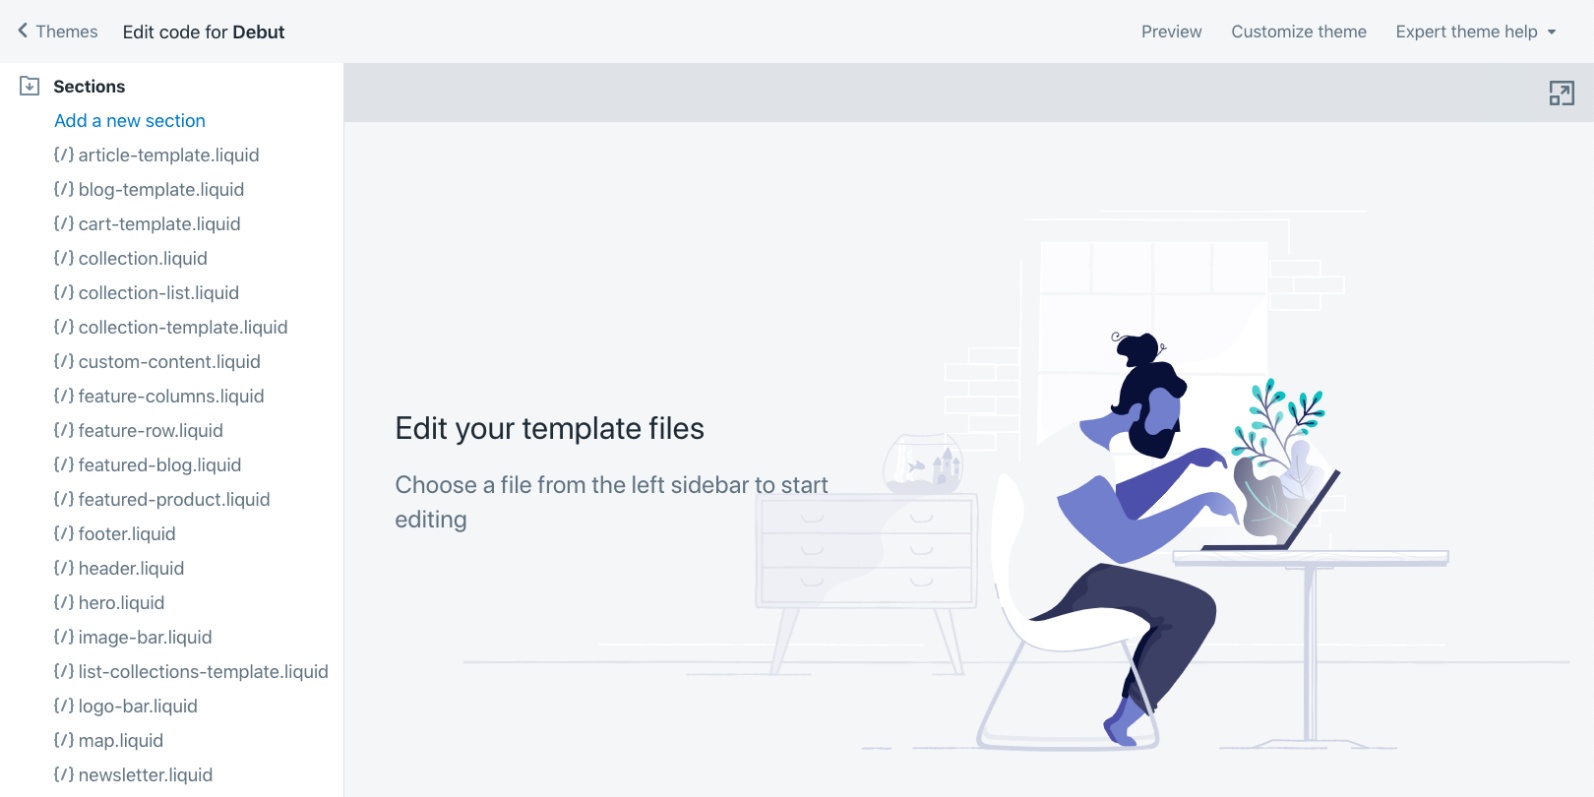
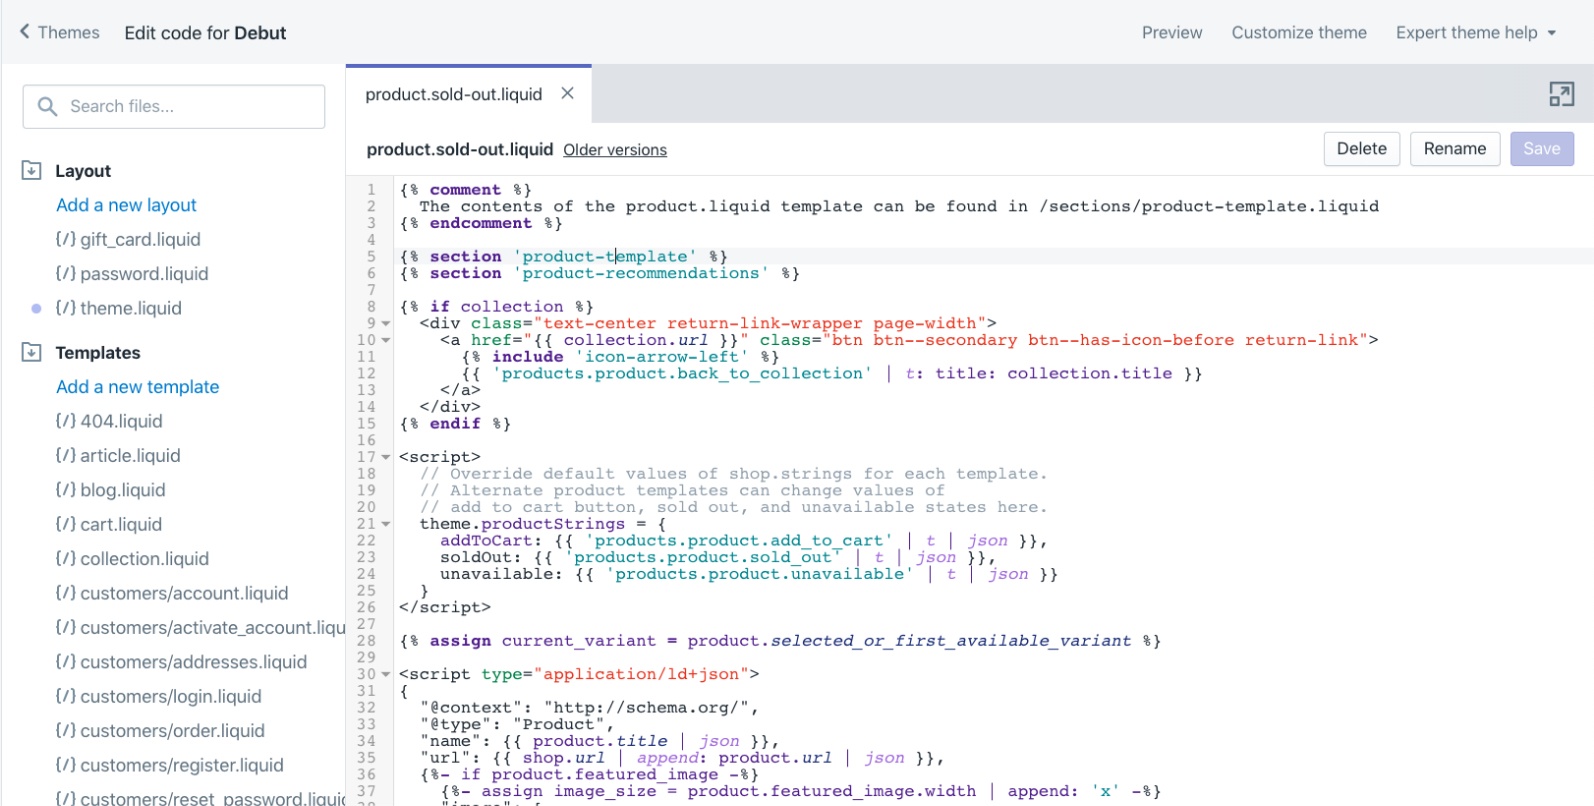
If the option is available, open the directory for Sections. If this contains files (for example, “{/} collection-template.liquid” your theme is “Sectioned”. The theme “Debut” (as shown above) is a sectioned theme.
How To Create a New Theme Template (Non-Sectioned)
Step 1: In the “Online Store” area, select the theme you want to add a template to and click on the drop-down “Actions” menu. Choose “Edit Code”.
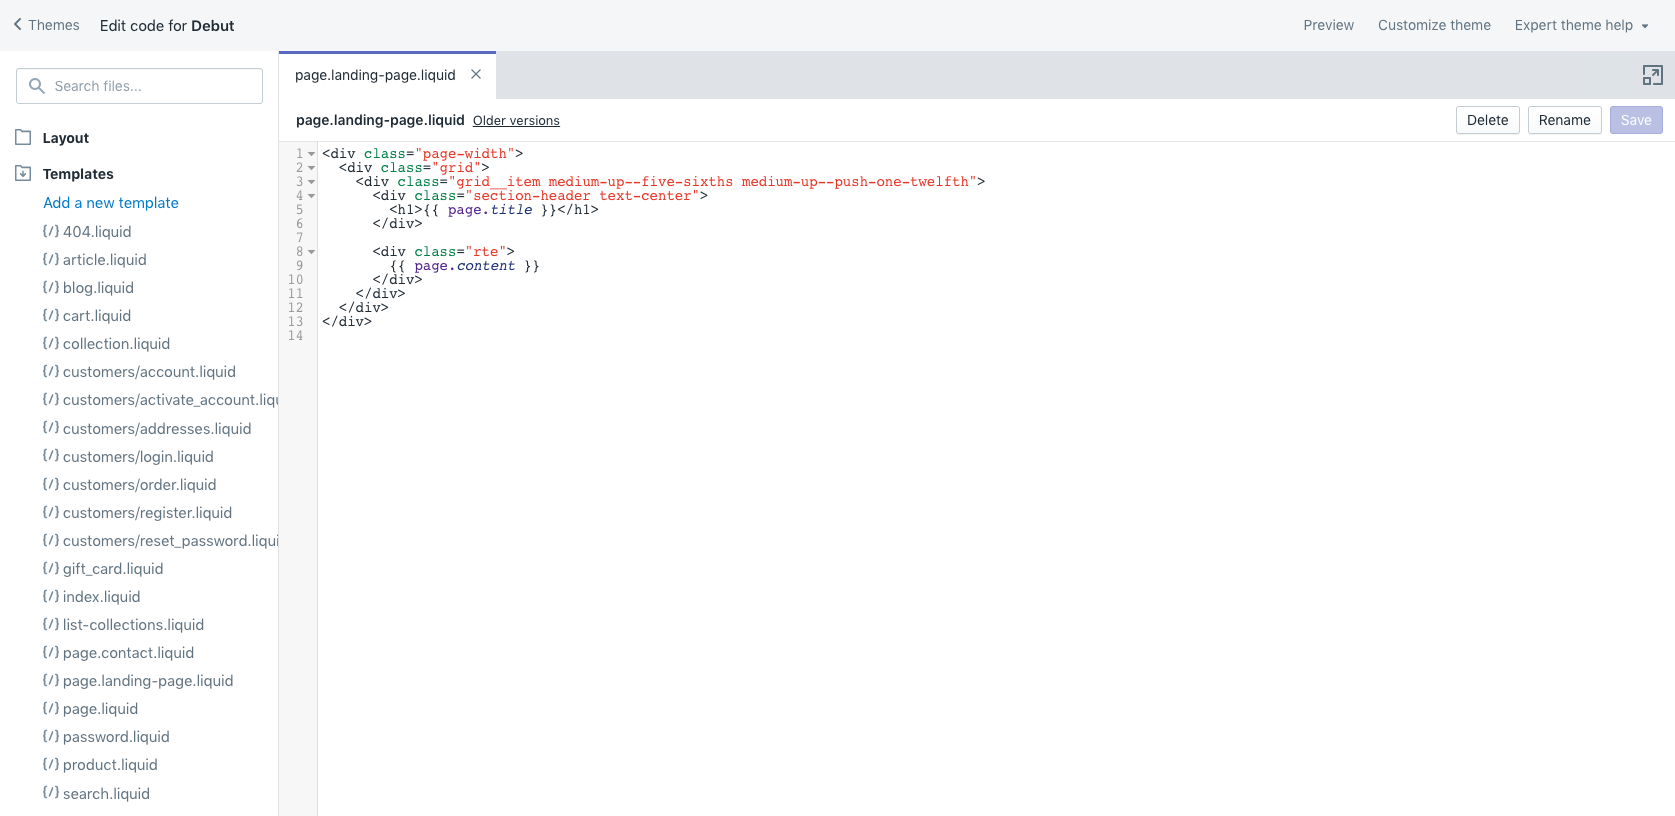
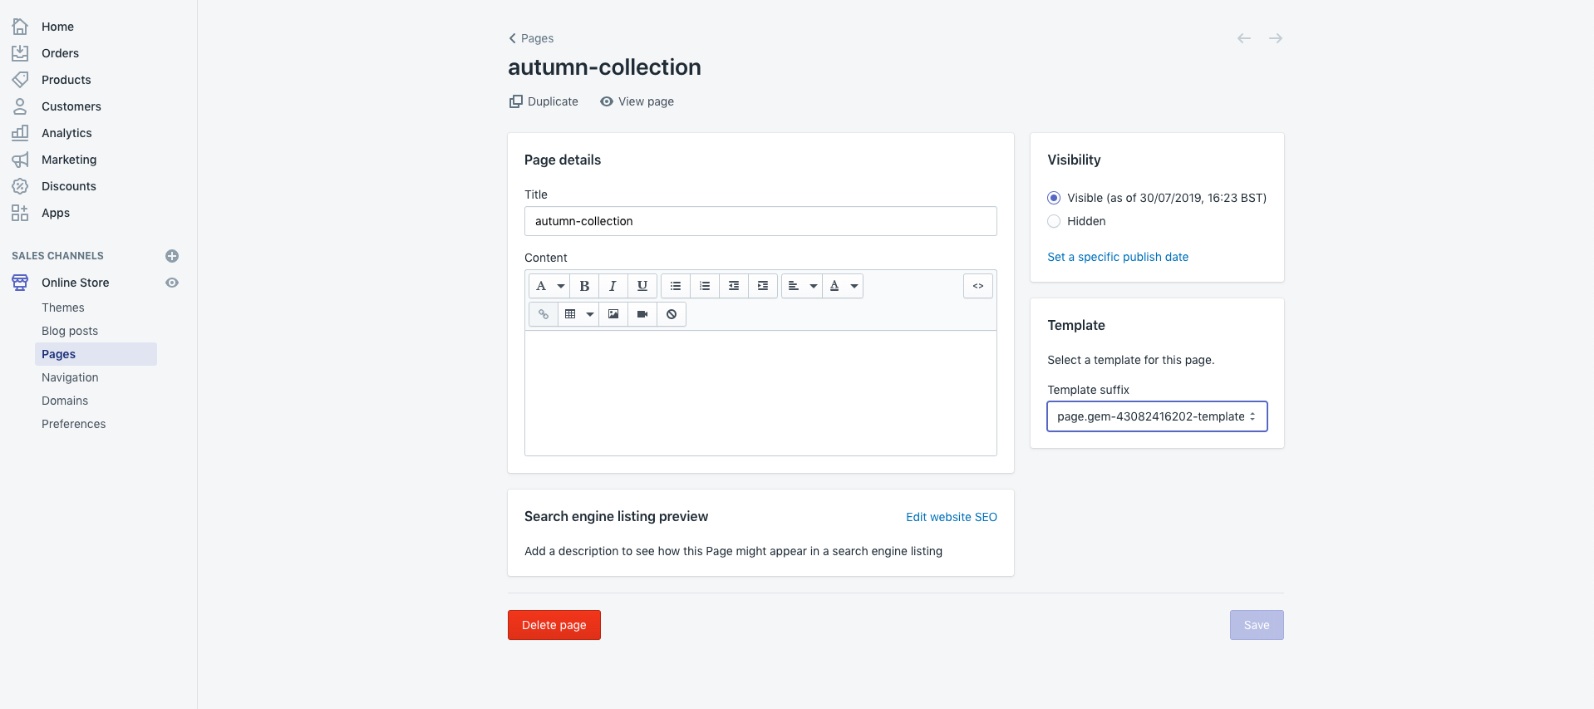
Step 2: Go to the Templates directory and click “Add a new template.” Use the pop-up window to select a type of template and give it a name (such as “autumn-sale” or “landing-page”).
Step 3: Once you have created the template you will be taken to the editor. Your template’s working name combines the page type (in this case “page”), the name (“landing-page”) and “.liquid” in a string. You can then edit the html code and click “save”
Step 4: After saving your edits, your template will available to apply to pages. To assign the template to a page, add it from the Template Suffix list.
How To Create a New Theme Template (Sectioned)
First: Follow Steps 1 to 3 for a Non-Sectioned theme. If you are able to edit the code for the feature you want in the template editor, then complete the instructions described above. If the code you want to edit is hidden inside a “Section” element, you will need to create a new section.
Step 1: Whilst still in the template editor, find the Liquid tag for the section you need to edit (in this case {% section ‘product-template’ %} and replace the name of the tag with a new name (this is what you will call the new section).
Step 2: When you have made these changes and saved the template, you need to create a section with the name you just created. If the liquid tag was {% section ‘product-landing-template’ %} your new section will be called product-landing-template.liquid. Go to the Sections directory, click “Add a new section” and give the new section the name product-landing-template.
Step 3: Once you have clicked “Create Section” you will be able to edit it. The editor will contain default code, so you should delete this. Copy and paste the code from the section you replaced in the template code (“product-template”). This can then be edited and saved as a new Section.
After saving your edits: You can follow the rest of the instructions above.
Custom Templates For Your Shopify Landing Page
Creating custom templates has a number of advantages over using collections pages or landing-page builders.
- They perfectly match the other pages in your theme
- You can customise them as much as you want, for free
- You can deliver a focused value proposition with a single CTA
NB. In case you get into trouble, Shopify provides further instructions for creating landing pages with custom templates.
3. Use a landing page app
The quickest and easiest way to build a Shopify landing page is to visit the app store and choose a page builder.These drag-and-drop programmes allow you to easily design new pages and add these to your store. They usually integrate with services like automated email systems, CRO tools or analytics accounts.
These are some of the most popular page builders in the Shopify app store.
PageFly – $0-29.95/month
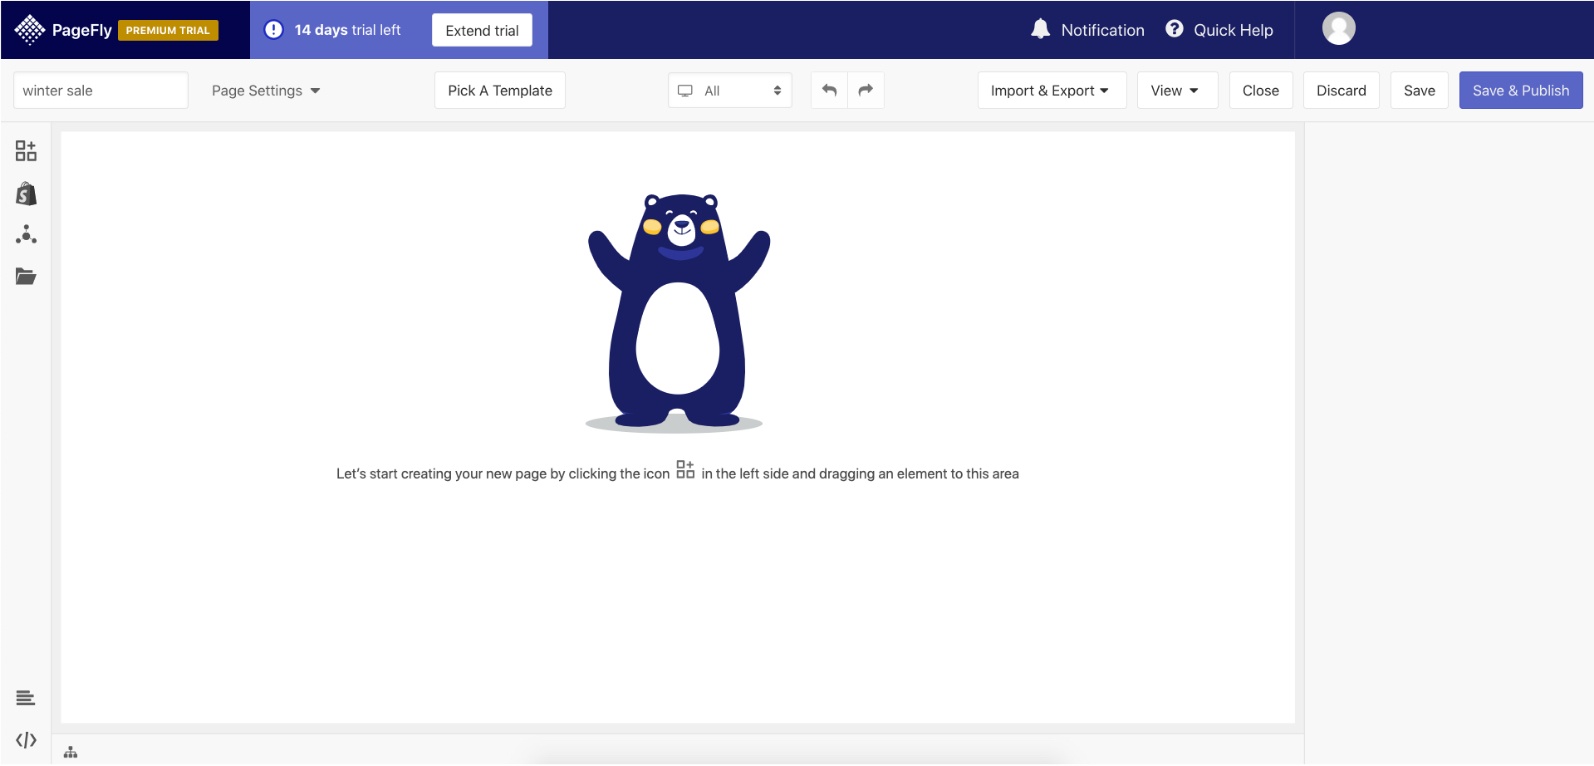
Good: The editor contains over 30 page elements, so you can really customise your landing pages. It is ludicrously easy to use, comes with plenty of templates and integrates with most other tools.
Bad: This can be an expensive way to create new pages, and best templates are restricted to the PRO and PREMIUM plans
Gempages – $15-59/month
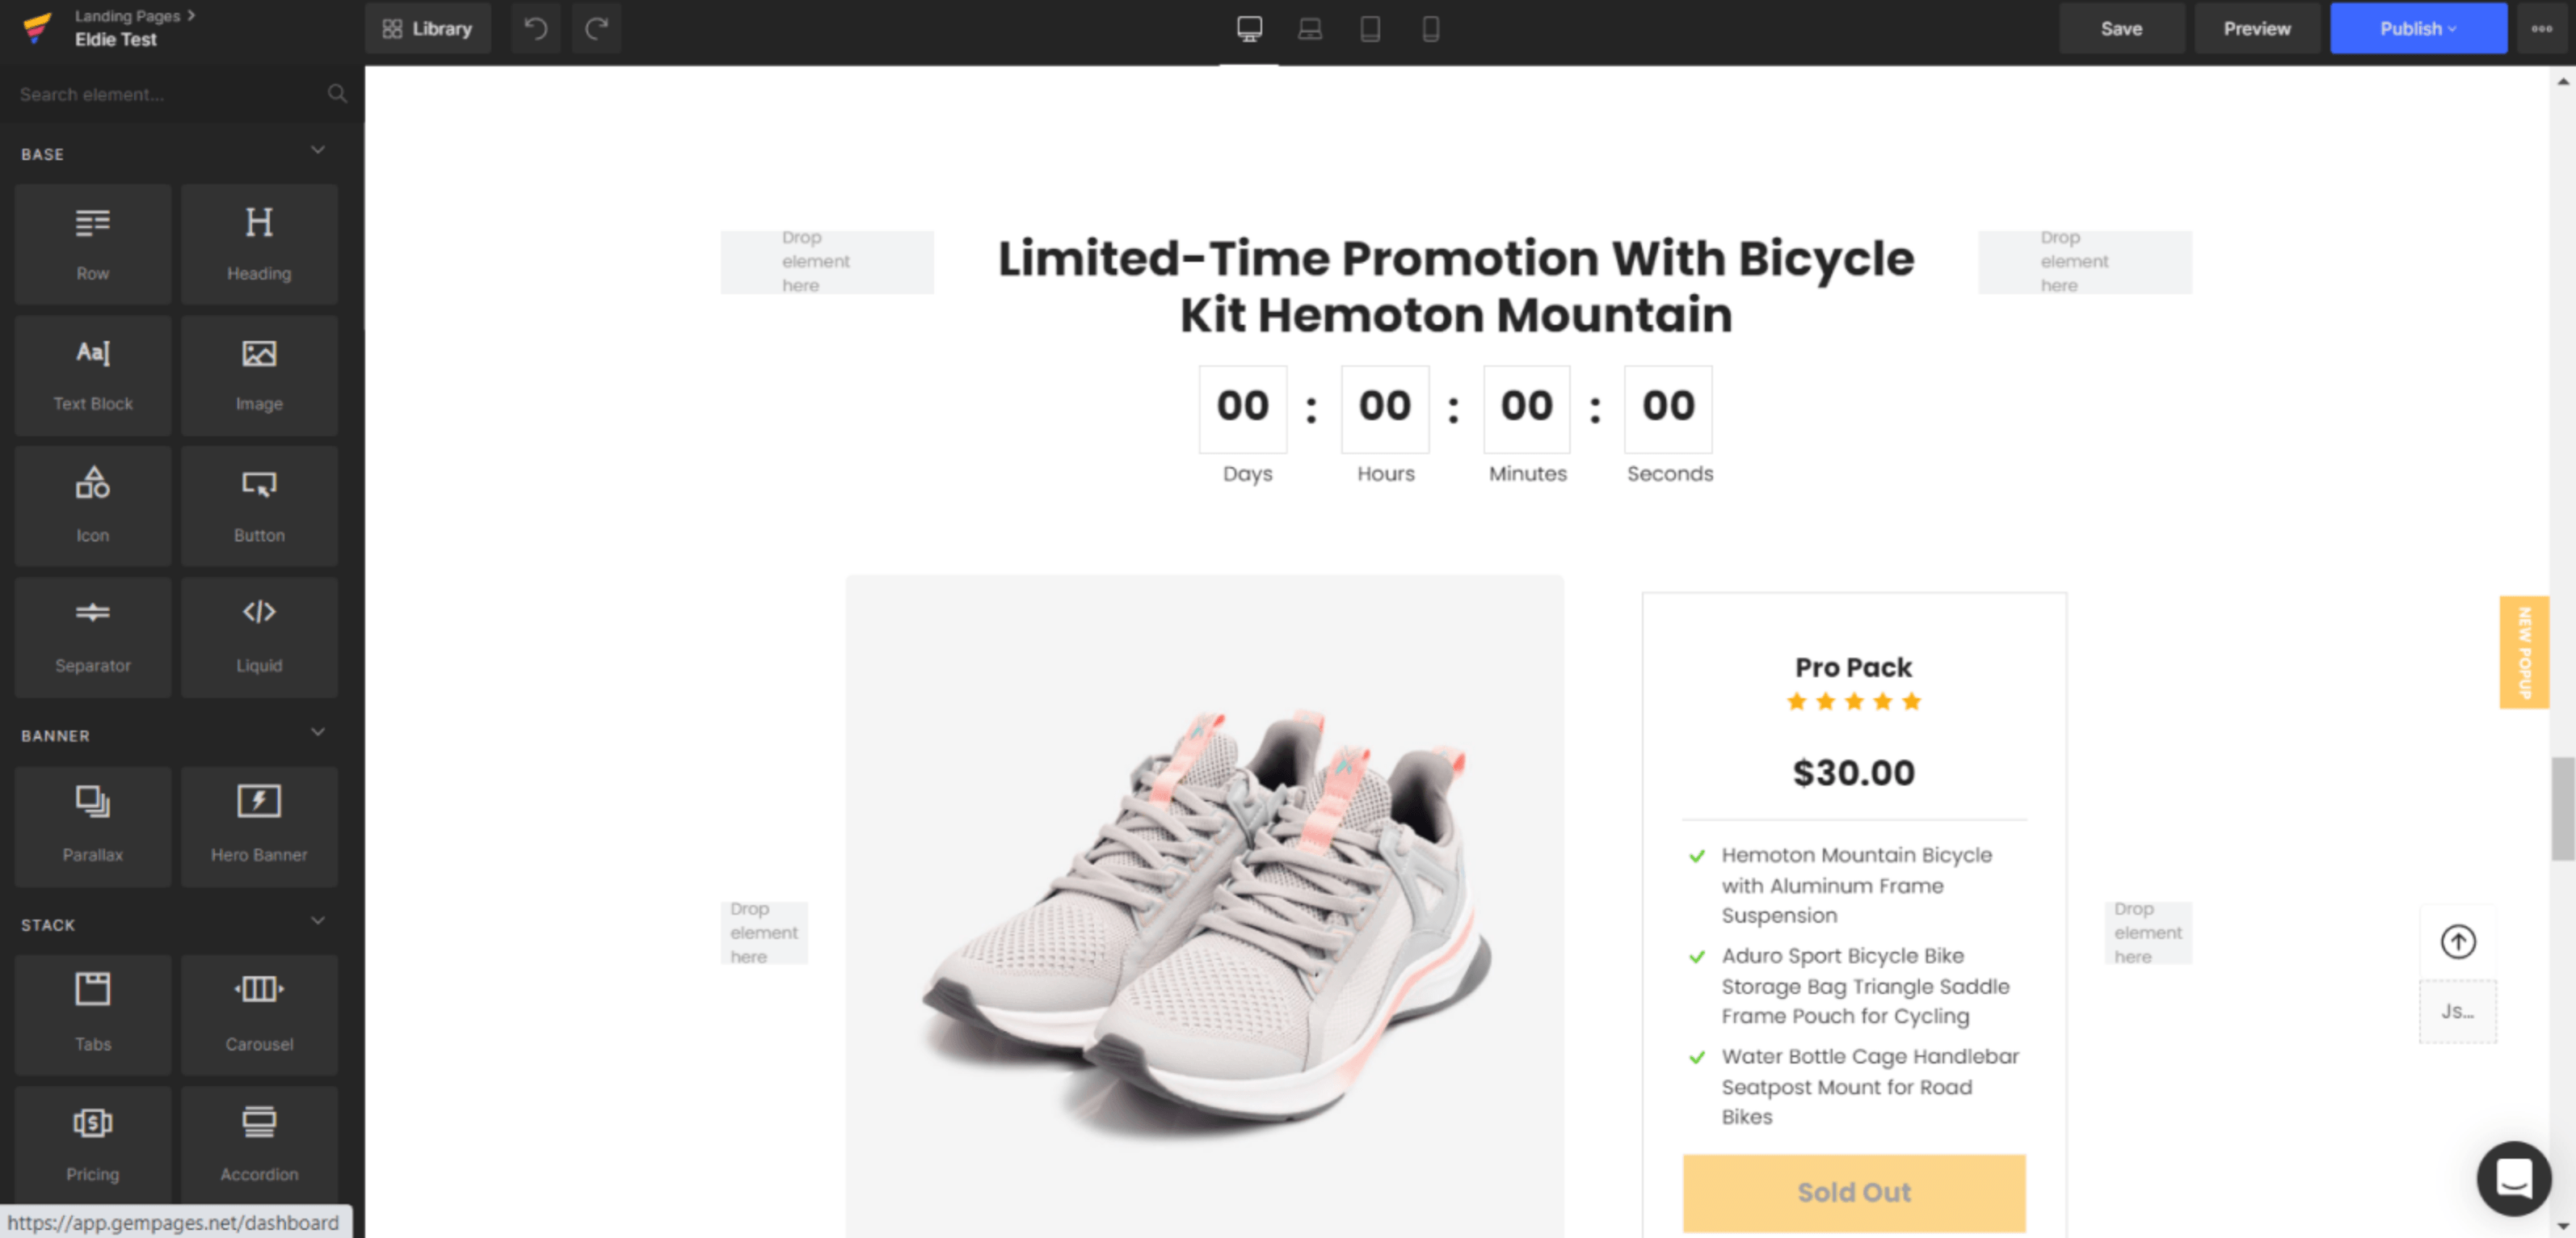
Good: This is one of the most powerful landing page builders for creating high-converting stores. You are granted 60+ templates and 100+ elements to customize the pages to your needs. Plus, their extensive library of marketing toolkits & sales boosters will be helpful in rocketing your sales.
Bad: They provide a 10-day trial only, not a free plan. Starter Plan does not include Pro Templates and A/B Testing.
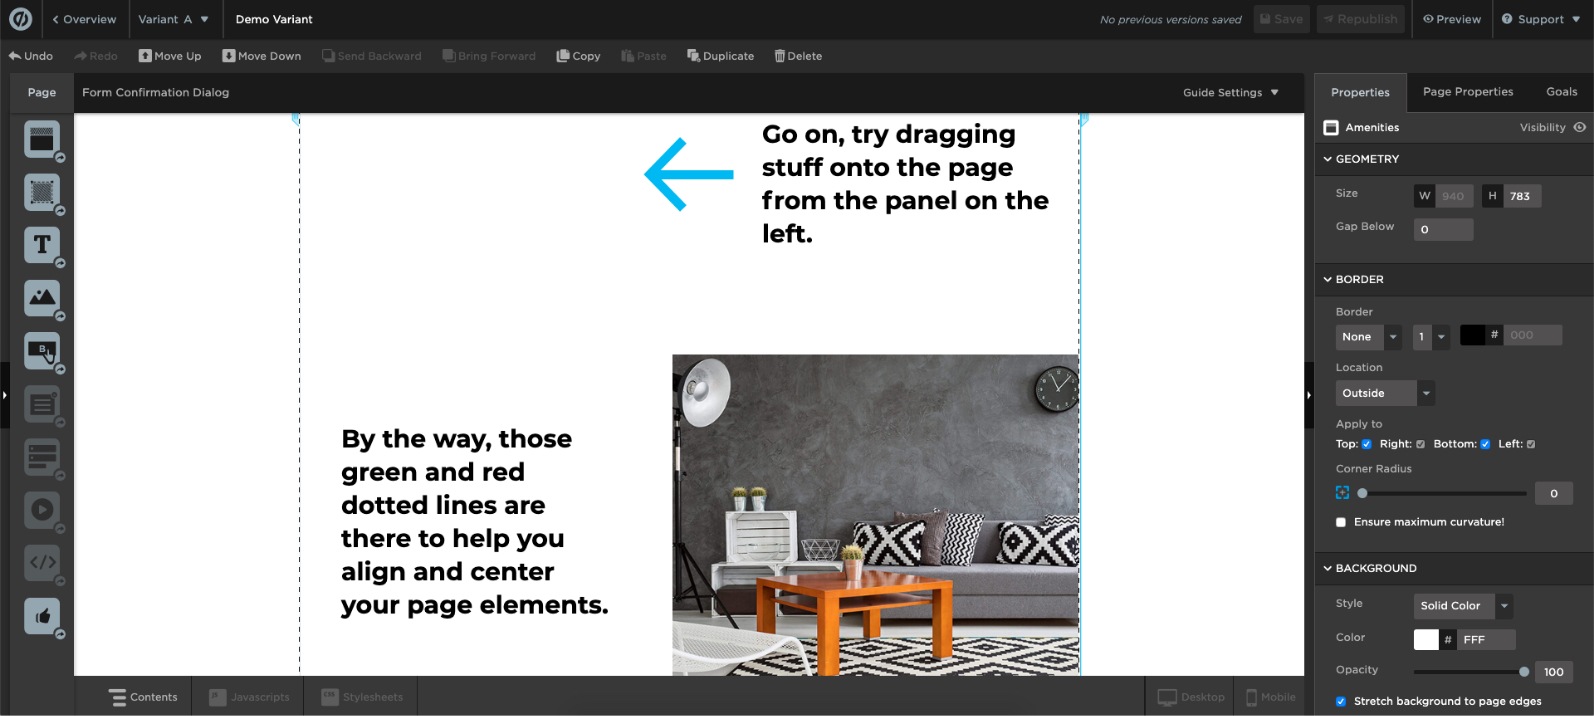
Shogun Page Builder – $39-149/month
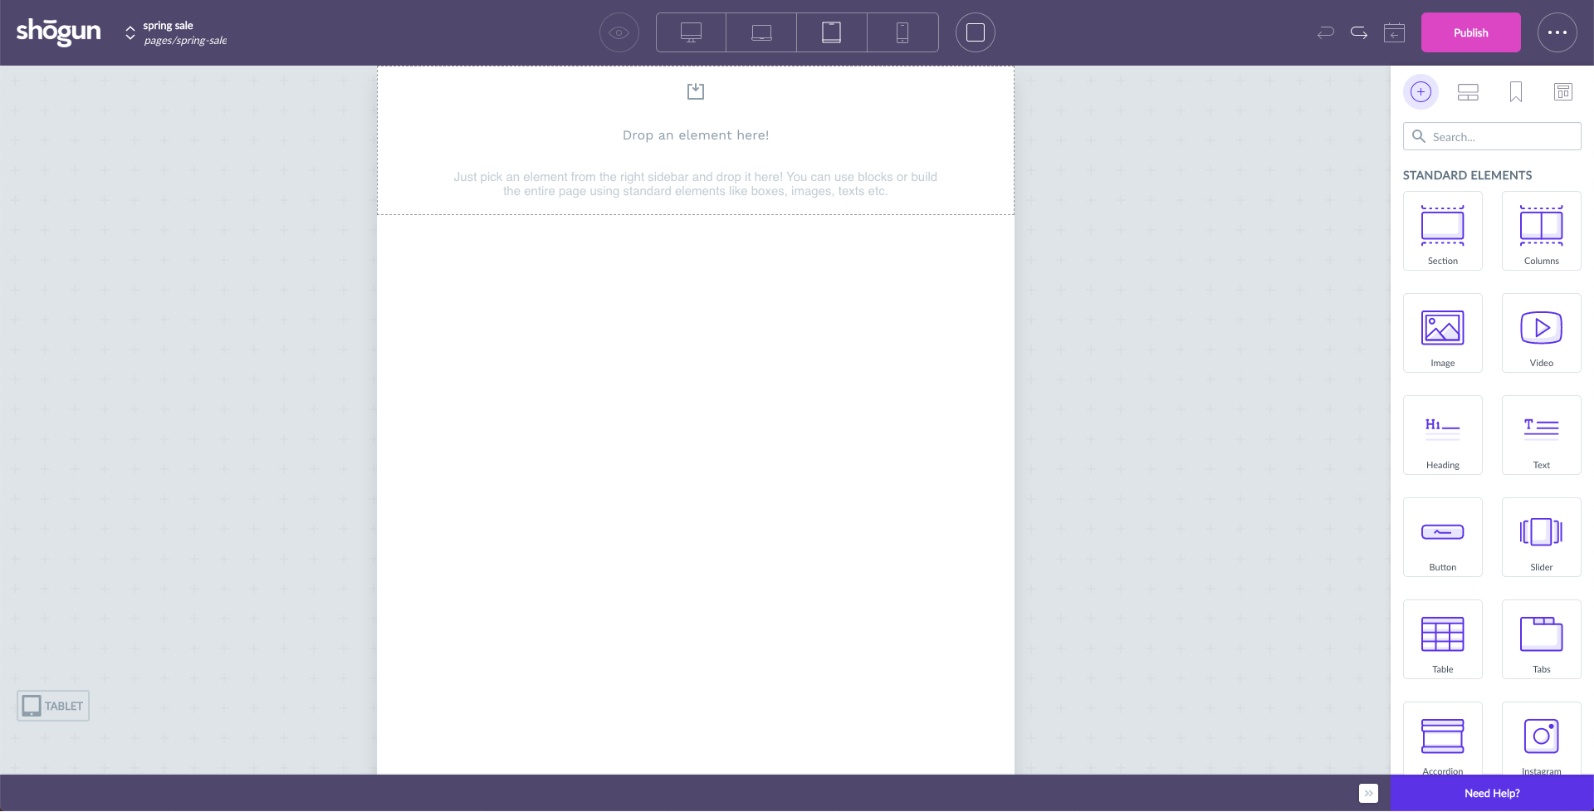
Good: This is the most comprehensive solution and is the best known Shopify landing page builder. It is easy to use and the customer service is renowned. The “preview” function is immediately accessible, giving you a quick way to check your designs.
Bad: If you’re paying such a hefty subscription fee, you need to make sure you get your money’s worth. No software is perfect and one or two users (out of thousands) have found bugs.
4. Use a Bolt-on Builder
Third-party software offers a more sophisticated way of designing and building Shopify landing pages. Using Shopify’s embeddable “Buy” button, you can incorporate any webpage into your store.
This method gives you all the flexibility you could want, but it does come with some drawbacks. These page builders are more expensive than the alternative Shopify apps. You may also have to do some technical work on your analytics account, to ensure you track customers from the beginning of the conversion funnel.
Unbounce – $79-399/month
Unbounce is the probably the best known landing page builder available. It comes with a range of add-ons such as drag-and-drop pop-ups and in-built A/B testing. You can track the conversion rate of your landing pages within the tool, by setting goal URLs. If you want to embed your Shopify “Buy” button into your landing page, Unbounce provides instructions.
On the downside, this tool comes with a slight learning curve for first-time users. It is also more expensive than some of the other page builders. For these reasons, it is probably a tool most suited to marketing departments within medium to large businesses.
LeadPages – $25-199/month
LeadPages can be used to create any kind of webpage, and offers a large selection of templates to build from. It does not offer as many testing or customisation features as Unbounce, but it comes with some nice alternatives (such as the built-in conversion guide, which makes design recommendations). The page builder is very Shopify-friendly, and elements such as the Shopify icon or “Buy” button can be added to a page from the drag-and-drop editor.
Not all the templates are available for the cheaper plans, and these are still a significant investment for a small business.
NB. Beware of the “free” trial, which will automatically switch to a paid plan after 14 days “if you choose not to cancel”.
5. Use a Shopify Social Proof & FOMO App
Using a Social Proof & FOMO App enables you to create instant Social Proof on your landing Page. Visits and Signups are converted into notifications that will instantly create trust and ultimately increase your conversion rates.
Nudgify – $9-89/month
With Nudgify you can use “Nudges” to display recent sign-ups and customer reviews. This app will boost your conversion rates.
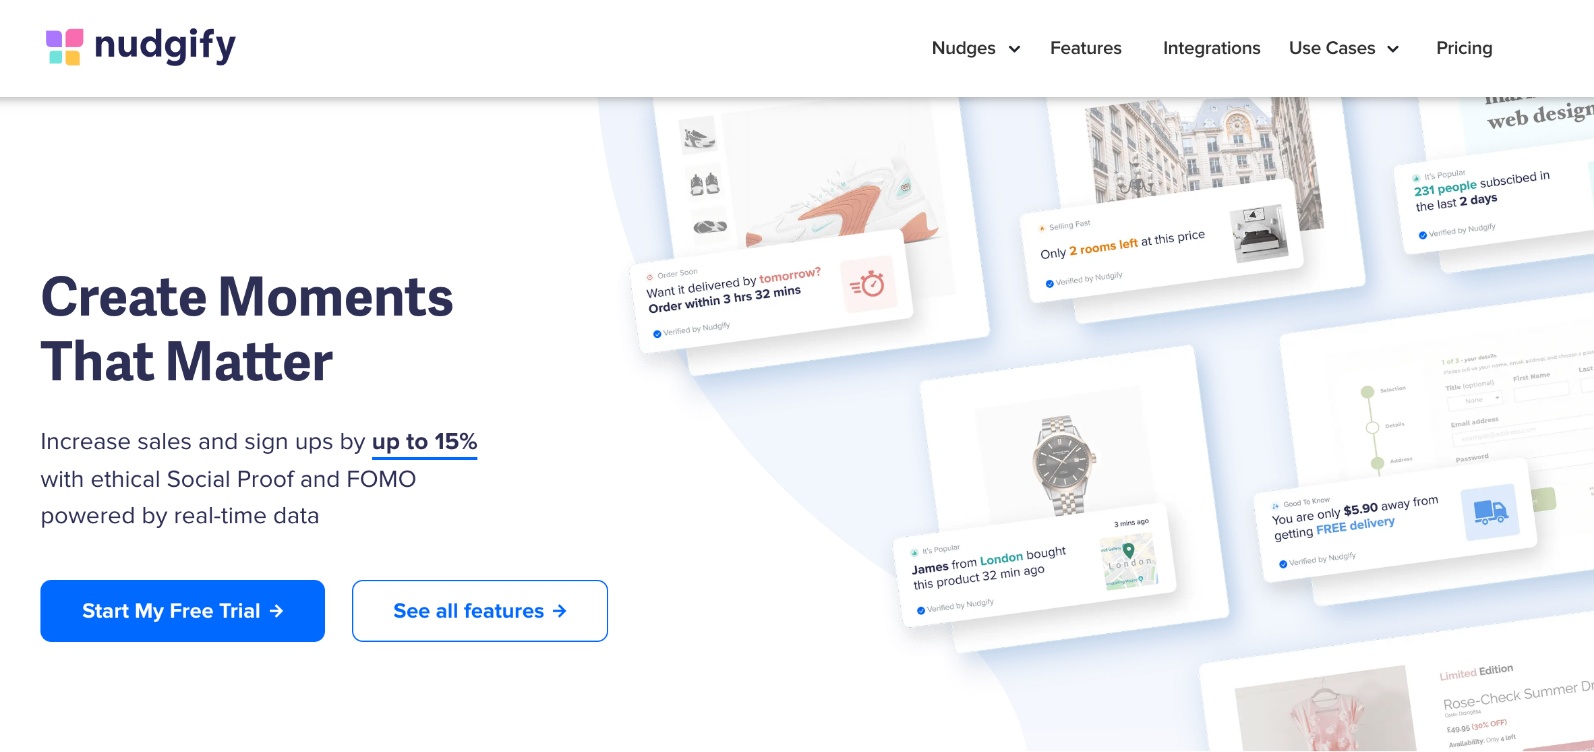
Offers a large library of nudges, integrates with 100s of other apps, clean interface.
DON’T LAUNCH Before Checking This Landing Page List
However you decide to build your Shopify landing page, you need to make sure it contains a few key things. Without these, it won’t work as hard as it should:
- A Value Proposition – Your headers and copy should clearly state the value you are offering
- Signposts – Your page should use visual cues to help people digest your content
- CTAs/Forms – Visitors should know exactly what they need to do at all times
- Trust and Proof – Security icons, reviews, partner badges and social shares all build trust
- Testimonials – Whatever you’re offering, your visitors won’t want to be the first to try it
- Nudges – Subtle cues that make your offer more appealing (such as scarcity, urgency or FOMO).
An easy way to apply all of these essential elements is to use social proof notifications (nudges). Engaging messages with dynamic content (such as your stock levels) stand a much better chance of reaching your visitors. Nudgify, the social proof app developed by Convertize, provides notifications and Sales Pops for Shopify stores.
If you’re designing a new store, and are looking for some inspiration, it’s relatively easy to explore some of the most successful Shopify stores and the most popular landing page designs. However, when building your own landing pages, you should focus on your target audience and the unique value you are offering.
Building A Shopify Landing Page That Converts
In order to create Shopify landing pages that your traffic sticks to, you need to focus on consistency, simplicity and trust. The majority of visual processing takes place in under 500 milliseconds (half a second), which means you don’t have long to make a good impression!
Once your page has been created, you need to make sure you fill it with the right material. Keep your headers focused around your value proposition and build the page around your CTA. Finally, to make sure your page is as sticky as possible, find ways to nudge your visitors towards the “Buy” button.
by Jochen Grünbeck
Jochen is co-author of "Smart Persuasion - How Elite Marketers Influence Consumers (and Persuade Them to Take Action)". After an MBA at INSEAD, he began his career at Airbus. Then, he moved on into Management Consulting, focusing on purchasing and negotiation strategy as well as cost optimisation projects for bluechip and midsize companies in France and Germany. His experiences led him to specialise in persuasion psychology, behavioural economics and conversion rate optimisation.


This guide is incredibly helpful for anyone looking to create effective Shopify landing pages! The detailed steps and options make it feel very achievable.